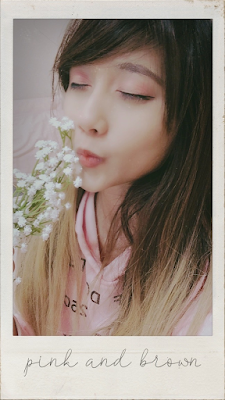
Hi everyone. I prepared a simple tutorial that I think is going to look amazing on everyone for this upcoming holiday. So first off, I chose the duo color scheme of pink and brown because i think it goes well with Valentine’s scheme/theme. It says everything about this holiday: soft and warm. So that’s the look we’re going for today. below I have listed all all of the product's we're going to be using for this tutorial:
B A S E P R O D U C T S : ✦
wet n wild photofocus face primer dewy lumineuxwet n wild photofocus concealer in medium peachmaybelline fit me! shine-free + balance foundation stick in natural beige 220pony effect coverstay cushion foundation in buffso natural make up holding finish powder fixer in natural yelloworiginal urban decay naked flushed palettetoo faced powder brushmilani make it dewy setting spray 16 hr wear in 04
E Y E P R O D U C T S : ✦
wet n wild illuminating palette in catwalk pinkl’oréal voluminous lash paradise base in millennial pinkheroine make long and curl mascara super film in 01urban decay 24/7 glide-on eye pencil in demolitionoriginal dolly wink liner in black
B R O W P R O D U C T :
the face shop designing eyebrows pencil in 03 brown
L I P P R O D U C T S : ✦
color pop ultra glossy lip in champagne mamibad habit liquified matte lipstick in broken heart
First, I do my skincare of course. I’ll do a separate post on this later. But the main skincare products I've used right before applying make up are [not pictured]:
the ordinary’s niacinamide 10% + zinc 1% serumthe face shop fresh lotus soothing gel moisturizermissha all around safe block essence sun spf 45/pa+++
Now that you’ve got your pre-base done. First thing I use is Wet n Wild Photofocus Face Primer Dewy Lumineux. It’s very light weight and absorbs fast under your skin. Next, I apply their concealer called Wet n Wild Photofocus Concealer in Medium Peach on my dark circles as well as all over the lid as an eye primer base.
Next, is Maybelline Fit Me! Shine-Free + Balance Foundation Stick in Natural Beige 220. I like this fore a more velvety finish that balances out the dewy primer we put on earlier so that we don’t look too shiny.
To brighten up the center of the face, I use Pony Effect CoverStay Cushion Foundation in Buff and put that in my forehead, nose area, and my chin as well. To set my eyes, I use So Natural Make Up Holding Finish Powder Fixer in Natural Yellow. This also brightens up any darkness under the eye.
And then after that, we’ll use the Original Urban Decay Naked Flushed palette and dip our Too Faced Powder Brush in the fawn-esque light brown color to lightly contour our jaws.
Then i grab my Pony Effect Puff Cushion and spray it with my Milani Make It Dewy Setting Spray 16 hr Wear in 04 and press that around my face to set everything. The smell of this spray is so amazing. You have to go out and get one yourself! I’m almost out and I can’t wait to purchase another one.
So the key product of this look is actually re-purposing a highlighter and using it as an eyeshadow. The Wet n Wild product i’m using is so pigmented enough to be an eyeshadow look. Plus, the swatches are what made me decide on it being the star of this tutorial. When you swatch, these they have micro silver glitters that are scattered and it looks so stunning. I had to try it as an eyeshadow look. The scattered glitter look looks so amazing and gives you that starry and dazed kind of look. Perfect for this coming romantic holiday we’re going to have. This palette I think, is almost a dupe for the Lemonade Craze palette by Maybelline because this tutorial does have a more peachy pink gold tone to it. But that palette is more expensive, and Wet n Wild’s only $5.
So first color I dip my brush to is the pink one right here. Actually, it’s even better if you just use your fingers. It warms up to the direct contact on the skin more. You can make it as opaque or washed out as you’d like. I prefer to make it look like a faded watercolor pink, so I blend it out a lot.
And then after I’ve covered my entire lid with that, I go next to the white gold that’s almost in the very outer corner edge of the palette on the left side. I put that right in the middle of the lid. And I blend that in well, so they look seamless together.
Next, I go for the color on the very right side - the warm peachy gold color. I put that in the inner corner of my eyes. The way it melds with the pink eyeshadow is simply stunning. I love love love it so much. I can’t stop staring at my eyes afterwards.
After this, I use my Dolly Wink Liner in black to make a puppy eye look. Cat-eye doesn’t look that flattering on me, but you definitely go for a cat-eye look if that suits you more. The puppy eye look is basically just following the natural lines in your eyes and stretching out the ‘wing’ horizontally to make your eyes wider. It gives you that fresh and innocent kind of look.
Then for the lower lid, I use my Urban Decay 24/7 Glide-on Liner in Demolition. It is a deep brown and I just put that at the outer corner of my eyes to match with the black liner right above it. For mascara, I first apply a lash primer. I’m using L’oréal Voluminous Lash Paradise Base in Millennial Pink. I wait for it to dry and once it is set, I apply two coats of the Heroine Make Long and Curl Mascara Super Film in 01.
Lastly, I do my brows with The Face Shop Designing Eyebrows in 03 brown. I focus on the tail of my brows instead of doing a full filled in kind of look. I just brush the front of my brows to make it look more natural and that’s all I do to it.
Now for the lip products, I only use two main products. First, I put a lip balm on top of my lips (actually from the very beginning since the base products to let it sit on your lips while you work on your eyes). I only do that because I have really dry lips. So after it’s been absorbed by my skin, I blot it out, by kissing the back of my hand. You could also use a tissue if you’d like. The product is not pictured, but I used Mamonde Lip Sleeping Mask in Plum Blossom.
After prepping my lips, I go on ahead and put Colourpop’s Ultra Glossy Lip in Champagne Mami. I don’t blot this out because, again, I have very dry lips.
And lastly, I use Bad Habit Beauty’s Liquified Matte Lipstick in Broken Heart. It’s a perfect nude terra-cotta earthy brown color that pairs well with the pink eyeshadow we did earlier. I put it only in the middle of the lips. Then i spread it out by putting my lips together.
And that is the finished look.
You may add false lashes or curl your lashes if you wish. Or opt for a matte pink color if you don’t like too much glitter on your look. I hope this tutorial helps you out in picking out what look to go for on your Valentine’s date and I hope you enjoyed it.
Until next time x !
Akso would really appreciate it if you'd help me grow and hit the follow button! Thank you xx
SUGGESTED READINGS:
x Ana Luisa NY: Kelly Necklace Review | Ambassador Liaison | Discount code included
x Sephora VIB Spring Sale 2021 | What I Picked Up
x Daiso Haul: Sakura Stationery | Pink Spring Haul
LET'S CONNECT!
Facebook | Twitter | Instagram | Bloglovin’ | Pinterest | Goodreads | Book Sirens
SUPPORT THE CREATOR
Support This Blog: Buy Me Coffee


 Support Me on Ko-fi


Post a Comment